

How to Brew Specialty Coffee in 2026: Step-by-Step
Table of Contents
- What Makes Coffee Specialty (And Why It Changes How You Brew)
- What You'll Need: Equipment for Brewing Specialty Coffee at Home
- Step 1: Get Your Specialty Coffee Brewing Ratios Right
- Step 2: Find the Best Grind Size for Pour-Over and Other Methods
- Step 3: Dial In Water Temperature for Coffee Extraction
- Step 4: Brew It: Pour-Over, French Press, AeroPress, and Cold Brew
- Common Mistakes That Ruin Specialty Coffee at Home
- Sustainable Brewing in 2026: Small Choices That Add Up
- Frequently Asked Questions
Last Updated: September 17, 2026
What Makes Coffee Specialty (And Why It Changes How You Brew)
Specialty coffee is coffee that scores 80 or higher on a 100-point scale set by the Specialty Coffee Association, and that score changes everything about how you brew it. This guide from Bird & Branch walks through the exact steps to brew specialty coffee at home, from ratios to water temperature to grind size.
What You'll Need: Equipment for Brewing Specialty Coffee at Home
Good coffee starts with a short list of gear. You don't need a $3,000 setup. You need a scale, a grinder, and a way to control water temperature.
The Non-Negotiables
- Digital scale accurate to 0.1 grams
- Burr grinder (hand or electric)
- Gooseneck kettle for controlled pouring
- Filter paper or metal mesh for your brewer
- Fresh whole beans with a roast date
Nice-to-Haves That Improve Consistency
- Thermometer if your kettle lacks temperature control
- TDS meter to measure extraction strength
- A second brewer so you can compare methods
A common mistake is buying an expensive brewer before upgrading the grinder. The grinder matters more. Always.
Gear |
Why It Matters |
Skip If |
|---|---|---|
Digital scale |
Controls ratio and repeatability |
Never skip |
Burr grinder |
Even particle size for steady extraction |
You only drink cold brew |
Gooseneck kettle |
Steady pour over the bloom phase |
You use immersion methods only |
TDS meter |
Confirms extraction strength |
You're happy tuning by taste |
Step 1: Get Your Specialty Coffee Brewing Ratios Right
The starting point for specialty coffee brewing ratios is 1:15 to 1:17, meaning one gram of coffee to 15-17 grams of water. That range gives you a balanced cup without over- or under-extracting.
Why 1:15 to 1:17 Works
This range sits in the sweet spot for solubility. Too little water and the coffee tastes heavy and bitter. Too much and it turns thin and sour.
- 1:15 for a bolder, heavier cup
- 1:16 for a balanced everyday brew
- 1:17 for a lighter, tea-like body
Using a Scale and Adjusting by Taste
Weigh your beans, then weigh your water. Skip the scoop. A scoop varies by grind, bean density, and how you level it.
Step 2: Find the Best Grind Size for Pour-Over and Other Methods
The best grind size for pour-over is medium-fine, roughly the texture of table salt. That size lets water pass through at the right speed for a 2:30 to 3:30 brew time.
Grind Size by Brewing Method
- Pour-over: medium-fine, like table salt
- AeroPress: fine to medium-fine
- French press: coarse, like sea salt
- Cold brew: very coarse, like peppercorns
Why a Burr Grinder Beats a Blade Grinder
A blade grinder chops beans into uneven chunks. Some particles over-extract, others under-extract, and the cup tastes muddy. A burr grinder crushes beans to a consistent size. Consistency is what makes extraction predictable.
Step 3: Dial In Water Temperature for Coffee Extraction
The right water temperature for coffee extraction is 195°F to 205°F, per Specialty Coffee Association brewing standards. Below 195°F, you under-extract and the cup tastes sour. Above 205°F, you scorch the grounds and pull out bitterness.
Temperature by Roast Level
Lighter roasts are denser and less soluble, so they need the hotter end of the range, 200°F to 205°F, to pull out the fruit and floral notes that define them. Darker roasts are more porous and extract faster, so 195°F to 200°F keeps the cup from turning ashy. If you brew a light Ethiopian and a dark Sumatra at the same temperature, one will taste hollow and the other will taste burnt.
Water Chemistry: TDS, pH, and Why It Matters
Water is roughly 98% of your cup. If it tastes off on its own, it will taste off in your coffee.
- TDS (total dissolved solids): Aim for roughly 75-125 ppm. Distilled or reverse-osmosis water has near-zero minerals, which makes coffee taste flat and lifeless because there's nothing for flavor compounds to bind to. Overly hard water (above ~200 ppm) mutes acidity and can scale your kettle.
- pH: Brew water should sit near neutral, around 6.5-7.5. Water that's too alkaline dulls brightness; water that's too acidic can push sourness.
- Key minerals: Magnesium and calcium help extract flavor compounds. A common specialty target is roughly 2:1 magnesium to calcium, with a small amount of bicarbonate for buffering. You don't need lab gear, a simple TDS meter and a pH strip get you close.
A Practical Temperature Routine
- Boil, then let the kettle sit 30-45 seconds to drop into range, or use a variable-temperature kettle and set it directly.
- If you brew light roasts, set 202°F-205°F. For medium, 198°F-202°F. For dark, 195°F-198°F.
- Check your water's TDS once. If it's under 50 ppm or over 200 ppm, adjust before blaming your beans.
Step 4: Brew It: Pour-Over, French Press, AeroPress, and Cold Brew
Each method pulls different flavor notes from the same bean. Pick the one that matches your routine and your taste, then dial it in with the specific variables below.
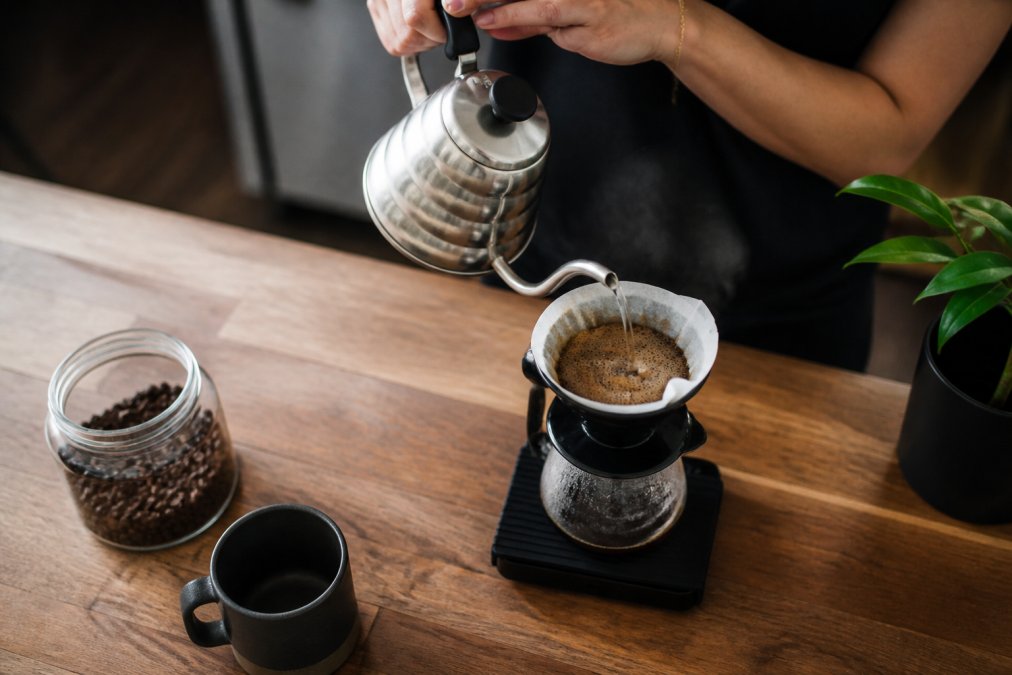
Pour-Over: The Bloom Phase and Controlled Pour
Start with a coffee-to-water ratio of 1:16. Pour twice the coffee's weight in water and wait 30-45 seconds. This is the bloom phase, when trapped carbon dioxide escapes. Then pour in slow circles until you hit your total water weight. Total brew time: 2:30 to 3:30.
Dial-in variables:
- Grind: medium-fine, like table salt. If the brew drains in under 2:00, go finer; if it stalls past 4:00, go coarser.
- Pour rate: keep the water level steady and avoid pouring directly onto the filter wall. A gooseneck kettle gives you the control a standard spout can't.
- Agitation: a gentle swirl after the bloom helps even extraction. Too much agitation channels the bed and causes uneven flow.
- Troubleshooting: sour and thin means under-extracted, grind finer or raise temperature. Bitter and dry means over-extracted, grind coarser or shorten the brew.
Immersion Methods: French Press and AeroPress
French press uses a coarse grind and a 4-minute steep. AeroPress is faster, around 1:30 to 2:00, with a finer grind. Both rely on steeping rather than a steady pour, so agitation matters less, but the variables still matter.
French press dial-in:
- Coarse grind, like sea salt. Too fine and the mesh lets silt through, leaving a muddy cup.
- After the 4-minute steep, break the crust with a spoon and skim the foam before pressing slowly. Pressing too fast stirs up fines.
- Ratio: 1:15 for a heavier body, 1:17 for a cleaner cup.
AeroPress dial-in:
- Fine to medium-fine grind. A 1:12 to 1:15 ratio is common for a concentrated cup you can dilute.
- Water temperature 175°F-200°F depending on roast. Lower temperatures reduce bitterness in dark roasts.
- Stir 10 seconds after adding water, then press slowly over 20-30 seconds. Pressing too hard channels the puck.
Cold Brew: Time Replaces Heat
Cold brew trades heat for time. Use a very coarse grind and a 1:8 concentrate ratio, then steep 12-18 hours in the fridge. Dilute to taste before serving. The result is low-acid, smooth, and heavy in body.
Dial-in variables:
- Grind: very coarse, like peppercorns. Too fine and the concentrate turns bitter and cloudy.
- Time: 12 hours for a brighter, lighter concentrate; 18 hours for a deeper, sweeter one. Past 24 hours it starts tasting woody.
- Dilution: a 1:8 concentrate typically dilutes 1:1 or 1:2 with water or milk before serving. Taste as you dilute.
Which Method Should You Use?
Method |
Grind |
Ratio |
Time |
Best For |
|---|---|---|---|---|
Pour-over |
Medium-fine |
1:16 |
2:30-3:30 |
Clarity, light roasts |
French press |
Coarse |
1:15-1:17 |
4:00 |
Body, dark roasts |
AeroPress |
Fine to medium-fine |
1:12-1:15 |
1:30-2:00 |
Speed, versatility |
Cold brew |
Very coarse |
1:8 concentrate |
12-18 hrs |
Smooth, low-acid |
Common Mistakes That Ruin Specialty Coffee at Home
The biggest mistake is brewing by volume instead of weight. A scoop of coffee varies wildly, so your ratio drifts and your cup changes every day.
Other frequent errors:
- Stale beans. Buy beans with a roast date and use them within a few weeks.
- Wrong grind. A grind that's too fine clogs the filter and slows the brew.
- Water that's too cool. It leaves the cup sour and hollow.
- No scale. You can't repeat a brew you didn't measure.
Sustainable Brewing in 2026: Small Choices That Add Up
Sustainable brewing starts with buying from roasters who publish where their beans come from. Traceability is the first step, because you can't support a farm you can't name.
A few choices that reduce waste:
- Reusable metal mesh filters instead of paper
- Composting spent grounds for gardens or local programs
- Buying whole bean to skip packaging waste
- Choosing roasters who pay fair prices to growers
Frequently Asked Questions
What makes coffee 'specialty' versus regular coffee?
Specialty coffee is graded by licensed Q graders and must score 80 or higher on a 100-point scale. That score reflects bean quality, growing conditions, processing, and roast execution. Regular grocery coffee typically scores below 80 and often sits on shelves for months. Freshness matters too: specialty roasters print roast dates, not just best-by dates, so you can brew within two to four weeks of roasting. When you brew specialty coffee, you're working with beans that have distinct flavor notes, acidity, and body worth preserving through careful extraction.
What are the best brewing ratios for specialty coffee?
Start with a 1:15 to 1:17 coffee-to-water ratio by weight. That means 20 grams of coffee to 300-340 grams of water. Stronger ratios like 1:15 suit immersion methods such as French press, while 1:16 or 1:17 works well for pour-over. Use a digital scale rather than scoops, since bean density varies. If the cup tastes sour or thin, tighten the ratio slightly. If it tastes bitter or hollow, add water. Adjust one variable at a time so you know what changed.
What is the ideal grind size for pour-over coffee?
Pour-over typically calls for a medium-fine grind, similar in texture to table salt. If the brew drains faster than two and a half minutes, grind finer. If it stalls past four minutes, grind coarser. The best grind size for pour-over depends on your dripper and filter, so treat any starting number as a baseline and adjust by taste. A burr grinder gives you consistent particle size, which matters more than the exact setting because uneven grounds extract at different rates and muddy the flavor.
How does water temperature affect coffee extraction?
Water temperature for coffee extraction sits between 195°F and 205°F for most methods. Below that range, extraction slows and the cup tastes sour and underdeveloped. Above it, you pull bitter compounds and lose the delicate flavor notes that make specialty coffee worth buying. Let a kettle rest about 30 seconds off a full boil, or use a variable-temperature gooseneck kettle. For cold brew, temperature drops out of the equation entirely and time does the work instead, usually 12 to 18 hours in the refrigerator. Brewing specialty coffee at home comes down to control: weight, grind, temperature, and time. Bird & Branch roasts locally and publishes where every bean comes from, so you can trace your cup back to the farm. We also run a job-training program that helps people build careers in coffee. Visit Bird & Branch to find your next bag and brew with purpose.